Showing posts with label mrdt. Show all posts

MR DT: Album | Joy

Hello! End of the year means joy to me as I start to prepare some gifts for my dearest family and friends! This is also the time I start humming Christmas Carols while I work on my projects ha!
Today I am up on Mayaroad, and would like to share a mini album of Joy, having a dear friend in mind. She has kept almost every vintage Christmas postcards and photographs, a collection she loves dearly. I thought it would be nice to make an album for her.


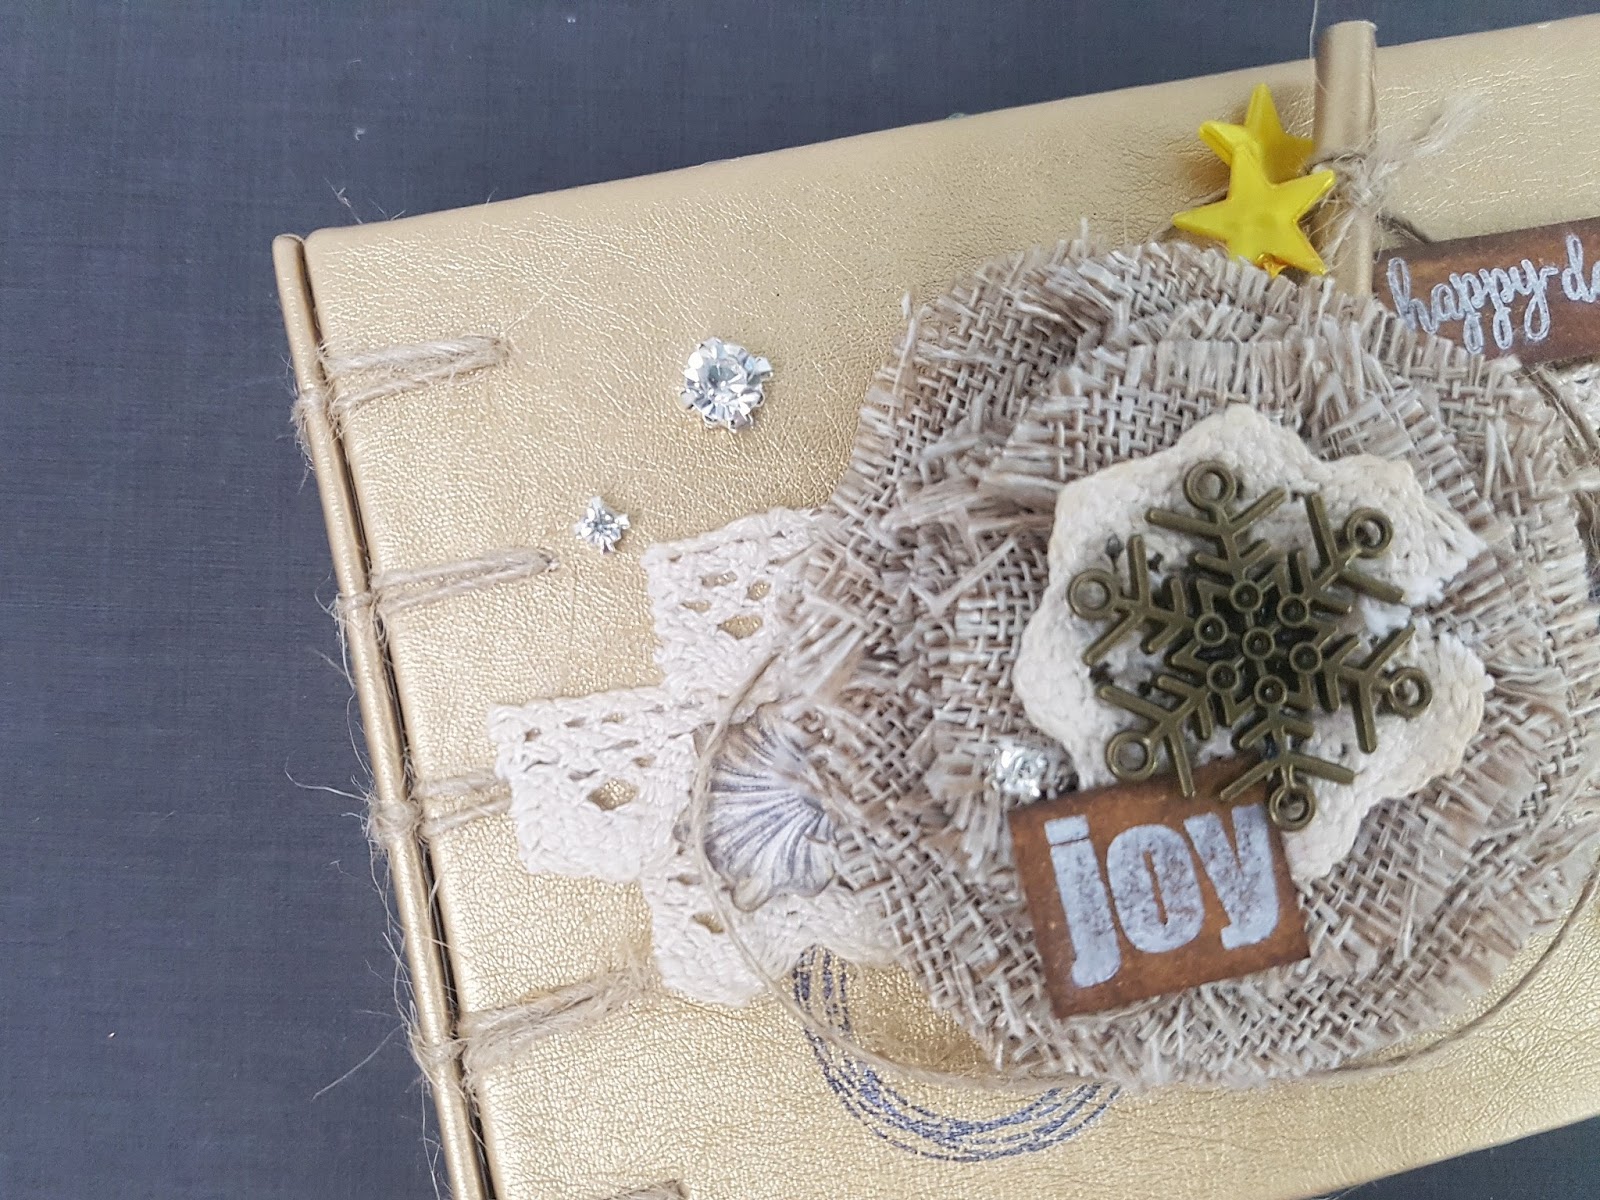
This album is covered with leather, then hand bounded together with secret belgium binding. This mode of binding is my favorite, because it can look vintage or fun loving depending on the thread you use. This time, I am using the jute craft string as the main element in this project. Gotta love this roll of jute craft string, I have to add some of these to almost all my projects!


The main focus on the album cover was the jewel center burlap blossom. I really liked this flower piece, it is grunge and elegant all at the same time! The only difference was that I used a plier to remove the jewel centre, so I could use them seperately as a splatter around my centerpiece.


I have used the KO vintage trims on this album. Since it was too white to my liking, I decided to add some coffee stains to it. It is really easy, just add coffee powder (no instant coffee mix, just plain grinded coffee beans) to water. Soak the trim until the color appeals to you.


I added the trims to the background in rows of different lengths, and also to the center of the burlap blossom. Just run a running stitch at the straight ends of the trim, and then tighten to form a rosette trim. To top it up, I added a snowflake metal charm. To add a title to the album, I started out with distressing on the remains of the shipping tags I had used previously. Then I stamped the word Joy and happy days with silver ink pad. These words are from the Homemade Holidays stamp set. Just for fun, I added a scroll tied together with the jute craft string and accompanied by the gold star pins.


For the pages I kept it simple yet with a little fun! These pull out tags creates interest for the receiver. I used the Manila shipping tags as a base, distressed with shades of brown for contrast. You can use these tags too! On a few pieces, I stamped the snowflakes  from the Homemade Holidays stamp set randomly on the tag. I have also added some jute craft strings here and there, and at the top of the shipping tag.


When slided, the shipping tag raises and disclose the photo that is behind it. I like this element of surprise for the receiver! At the base of the shipping tag, I have also added the coffee dyed trim and a row of the pearl center trim.


Here is how the slider mechanism looks like!

Hope you get inspired for Christmas projects with Mayaroad products!


Visit Mayaroad for more inspirations!


MR DT: LO | Lucky

Hello roadies! I am Stacy and back on the Mayaroad blog with a layout to share. This month at Mayaroad, we are celebrating the love for twine.
As most of you already know, this is my staple product so I am very excited to share this layout today!

The first thing which inspired me was to crochet a flower for my layout. Any stitching work inspires me for layouts, be it crochet or stitching patterns. In this case, I made 2 flowers with a crochet hook and the jute cording twine. Then, I added some pearl buttons as flower centers to complete the flower. 
The pearl buttons comes in different sizes and patterns. I love them all! So I decided to add in some of the smaller ones as well. They fill in the empty spaces and gives a glamour to the page. Beneath the layers, I have also added some jute that hangs my layers and photo.
The photo and layers are clipped onto the jue string by the bulldog clips. Easy way to add a decor piece onto the layout.
Don't forget to finish up the layout with the wood hexagons! These are another must have - I am addicted to using these little ones!
Hope you get inspired to use up those Mayaroad twines you have in your possession and add a few more to your collection! There is so much more reason to do so when there is a 30% off for all twine purchases using the code "TWINETIME". Check out the twine collection here.
Have a great week ahead!

MR DT: Mini Album | What I Like

Hello! I am back on the Mayaroad blog today with a mini album to share! Making this album had been fun! The design team has been sharing many ideas on how to use chipboards in our projects, and today, I will also share how I made use of chipboards in my mini album.

I wanted to make an album to house some of the things I love, and here is my mini album:


First way I usually like to use the chipboards - as album covers! There are many chipboard albums available in different shapes and sizes, great for use to construct mini albums! I used the 5x5 tabbed chipboard album to construct this mini album.


Like always, I always like to spice up the spine of my mini albums with some stitching! This time, I am using the Ken Oliver Waxed Hemp (Tangerine) for the long stitch binding on my spine! I love this waxed hemp for stitching, and it comes in a variety of colors!


Another way I used my chipboards is to paint them white, and draw some stitching lines on them! This is a fun and easy way to decorate the chipboards, and give it an interesting look too. Try dry brushing gesso onto chipboards, I like how some of the pieces give a weathered look!


Of course, adding acrylic paints gives the chipboards an entirely different look. With a base coat in place, I have also added some shimmer with some glitter glues on top. It gives a shiny coat and highlights the title.


Of course, I really love to dress up my chipboards! One of my favourite ways is to add some stamping on top of the base coat. Try it with raw chipboards as well, this gives a different texture and feel to the entire embellishment! On the top right corner, I have also tried coloring the chipboards with brush pens / markers.


Last but not least, use the chipboards as they are! Raw chipboards are pretty as they are - so feel free to use them directly on your projects. Raw chipboards gives a very good background to your embellishments, they are not cluttered or too colorful. On some chipboards, I also used some foil papers to back up the negative spaces for a little glow amongst the raw chipboard pieces.


Chipboards are the basic materials everyone needs for that next scrapbook project! Hope you find some inspiration! You will also be happy to know, that Mayaroad is having a promo this month for chipboards! Use the coupon code CHIPCHIP for 30% off all chipboards during your checkout! Enjoy the promo code!


Supplies Used:


MR DT: What Really Matters

Time sure passes fast! This is my first Maya Road project for 2017. Today, I made use of the 4" wood pallet and decided to add a photograph where I can change along the year to highlight different events!


This is a really simple and fun project to do. First, I gesso-ed the chipboard pieces.


Adding some random chipboard numbers to the pallet and topping it up with another layer of gesso:


Next, I added some textured paste using the diecut piece from Maya Road Dots ATC Die. Using the diecuts as stencils, I obmit the step of cleaning after use. That's one faster way of crafting! After the textured paste dries, I added some random stamping all around. If you need to, just dab lightly some additional gesso to reduce the contrast of the stamping. On the next step, I used 3D foam dots to pop up the MR Scalloped Frame ATC diecut.


I always love to have some vintage tone to the florals I use in projects. Here, I simply mixed some gesso with a little water, and applied lightly to the petals of the MR Medium Vintage Flowers.

Additionally, i used a piercer and twined the stems of the flowers around it. It looks like vines around the flower and I prefer this look.


Here I have a closer look at the completed project. I did add some light misting randomly to enhance the pink tones for this project. Kept it light, so it would not overwhelm the focus.


Another closer look at the portions with the textured paste. Love how it gives a random textured look.

I used the gold bulldog clip so I can change the photo whenever I wanted! That clip is really a must to all projects!


Adding elements to this project was easy. I used MR Vintage Doilies as a backdrop, and added the resin bird coupled with paper flowers and wooden token.

Last but not least, i added some porcelain pink resin mini mums to fill some empty spaces. This step is all i need to make the project feel complete.


Hope you like what I have shared today! Best wishes for the new year and till the next post!

For those residing in Singapore, Maya Road products are available in Made With Love.

Visit Maya Road for more inspirations!

MR DT: Pocket Letter

Hi I am back again on the Maya Road blog today with a pocket letter to share!

I am a huge fan of pocket letters. Mostly because I love to open up the mailbox and find myself in awe with the pretty mails another crafter has created for me.

Pocket letters are amazing! There are so many details packed into this mail art. Here's what I have done:


It was a wheeze creating this using all the wonderful Maya Road products! I started out with the Maya Road number clips. Love these clips! They add such a beautiful flair to the entire letter!

Towards the top of the letter, I have used the mini wood clothes pin to attach the Jute and Twine Cording which in turn hung some banners and mini envelope. I used the DIY mini envelope die, one of which was left open to create some interest. Now looking back I may want to add a mini letter to it!

For the banners, I used the ends of the bow die and folded half of it around the cording. I just used what was lying around on my table! There is another alternative to use the banner die!


In another pocket, i added a shaker card using the hearts from the Heart ATC die and some sequins for added shine. I find it a bonus to be able to use the postives of the die cut as well as the negatives!

To top it up, I added a kraft butterfly and wood token.


Here, i added the glasses from one of Maya Road's new Die Sets! Here, I layered 3 die cuts for added interest.


This pocket is layered with the diagonal ATC die. This is one of my most used dies! Love that it is simple and at the same time, helps to bring out the other emblishments which I place on them.

On 1 pocket I have added wood frame and the most gorgeous Ken Oliver Gears.

On the other, I have added the mini wood embroidery frame encasing a sentiment and the Ken Oliver Art Supplies trinklet. I love to add some complementary pockets - they look different yet the same!


Of course I had to add these to my pocket letter! Now the Maya Road tassels come in gold caps and I love them all!

Here I have used the Fire red gold cap tassel and the sand beige tassel. I have also added the bronze gift charms using the mini safety pins.


Finally to complete the look! I added a paper bag to hold my completed pocket letter. 


Decorating it was easy. I started with Maya Road trims, like the lace and measuring tape


Then I worked on a seperate tag to clip onto the package. I started with a kraft doily and pattern paper. 

Then i layered with the geometric leaves, star pinsfelt roses and rolled flower.  Love how easy it is to make my own flower embellishment and this time I added a pearl in the flower centre for some light bling.

Slot another Ken Oliver crafting tool embellishment in the midst of the flower arrangement and viola!


Hope you have enjoyed this walk through on my pocket letter today! 


Don't forget to grab your Maya Road supplies and start the crafty fun! And look out for the new dies coming your way pretty soon!


Maya Road Supplies Used:

For those residing in Singapore, Maya Road products are available in Made With Love.

Visit Maya Road for more inspirations!