
Hello! End of the year means joy to me as I start to prepare some gifts for my dearest family and friends! This is also the time I start humming Christmas Carols while I work on my projects ha!
Today I am up on Mayaroad, and would like to share a mini album of Joy, having a dear friend in mind. She has kept almost every vintage Christmas postcards and photographs, a collection she loves dearly. I thought it would be nice to make an album for her.

This album is covered with leather, then hand bounded together with secret belgium binding. This mode of binding is my favorite, because it can look vintage or fun loving depending on the thread you use. This time, I am using the jute craft string as the main element in this project. Gotta love this roll of jute craft string, I have to add some of these to almost all my projects!

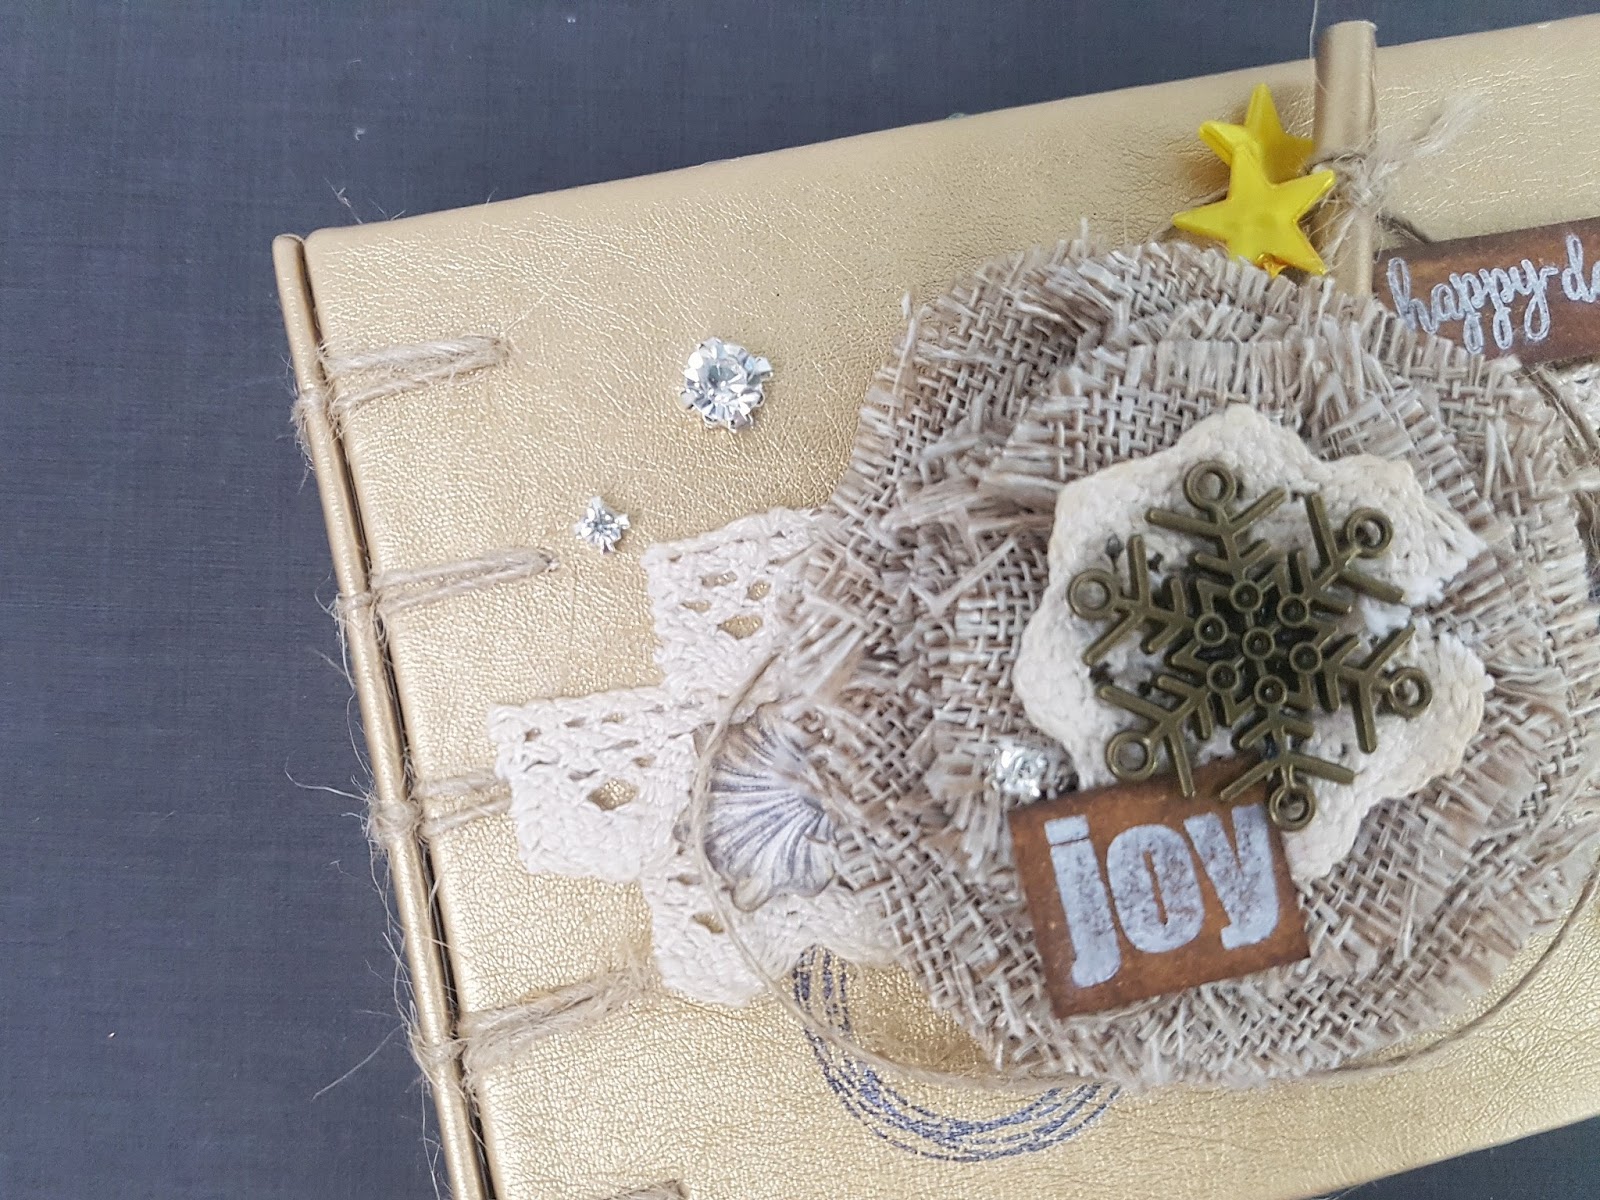
The main focus on the album cover was the jewel center burlap blossom. I really liked this flower piece, it is grunge and elegant all at the same time! The only difference was that I used a plier to remove the jewel centre, so I could use them seperately as a splatter around my centerpiece.

I have used the KO vintage trims on this album. Since it was too white to my liking, I decided to add some coffee stains to it. It is really easy, just add coffee powder (no instant coffee mix, just plain grinded coffee beans) to water. Soak the trim until the color appeals to you.

I added the trims to the background in rows of different lengths, and also to the center of the burlap blossom. Just run a running stitch at the straight ends of the trim, and then tighten to form a rosette trim. To top it up, I added a snowflake metal charm. To add a title to the album, I started out with distressing on the remains of the shipping tags I had used previously. Then I stamped the word Joy and happy days with silver ink pad. These words are from the Homemade Holidays stamp set. Just for fun, I added a scroll tied together with the jute craft string and accompanied by the gold star pins.

For the pages I kept it simple yet with a little fun! These pull out tags creates interest for the receiver. I used the Manila shipping tags as a base, distressed with shades of brown for contrast. You can use these tags too! On a few pieces, I stamped the snowflakes from the Homemade Holidays stamp set randomly on the tag. I have also added some jute craft strings here and there, and at the top of the shipping tag.

When slided, the shipping tag raises and disclose the photo that is behind it. I like this element of surprise for the receiver! At the base of the shipping tag, I have also added the coffee dyed trim and a row of the pearl center trim.
Here is how the slider mechanism looks like!

The main focus on the album cover was the jewel center burlap blossom. I really liked this flower piece, it is grunge and elegant all at the same time! The only difference was that I used a plier to remove the jewel centre, so I could use them seperately as a splatter around my centerpiece.

I have used the KO vintage trims on this album. Since it was too white to my liking, I decided to add some coffee stains to it. It is really easy, just add coffee powder (no instant coffee mix, just plain grinded coffee beans) to water. Soak the trim until the color appeals to you.

I added the trims to the background in rows of different lengths, and also to the center of the burlap blossom. Just run a running stitch at the straight ends of the trim, and then tighten to form a rosette trim. To top it up, I added a snowflake metal charm. To add a title to the album, I started out with distressing on the remains of the shipping tags I had used previously. Then I stamped the word Joy and happy days with silver ink pad. These words are from the Homemade Holidays stamp set. Just for fun, I added a scroll tied together with the jute craft string and accompanied by the gold star pins.

For the pages I kept it simple yet with a little fun! These pull out tags creates interest for the receiver. I used the Manila shipping tags as a base, distressed with shades of brown for contrast. You can use these tags too! On a few pieces, I stamped the snowflakes from the Homemade Holidays stamp set randomly on the tag. I have also added some jute craft strings here and there, and at the top of the shipping tag.

When slided, the shipping tag raises and disclose the photo that is behind it. I like this element of surprise for the receiver! At the base of the shipping tag, I have also added the coffee dyed trim and a row of the pearl center trim.
Here is how the slider mechanism looks like!
Hope you get inspired for Christmas projects with Mayaroad products!

Visit Mayaroad for more inspirations!


