Showing posts with label Made With Love. Show all posts

MWL DT: LO | LOL

Hello hello! I am posting as Made With Love DT today, sharing a stitched layout this time. It was Father's day yesterday, so today's post is really dedicated to my hero. Happy Father's Day, daddy! You are always my hero and first love *kisses*


When I started out this layout, I knew I wanted it to be in a geometrics theme. My dad is an engineer, he is also the one who had inspired me to be one. So when I laid eyes on Paige Evans' Pink Paislee Pick Me Up collection, I immediately got inspired by one of the papers.
Pink Paislee - Paige Evans - Pick Me Up Collection

What do you see from this paper? I literally saw diamonds jumping at me! So I took out my trusty scissors and immediately cut those shapes up, knowing they would well fit onto my layout. In addition, I did have them matted onto another pattern paper in the same collection just to give it a boost of contrast on the layout.


Oh, but I really had to add some more texture to the entire layout. Of course there had to be stitching! I decided to use another geometric design as the background, hence deciding to fill it up with a hexagonal/diamond pattern. Adding stitches adds a whole new dimension of texture and outlook to the entire layout, so I really love to add these stitches to my layouts.


Journal on your layouts! This is such an important part of layouts, but most commonly neglected. Most are afraid to write, but documenting memories really means recording the thoughts of the photo or layout. I use my trusted WRMK typecast for my journal purposes. It can take in 12" papers, and that is one big bonus for scrappers! In this case, I chose to cut them out in strips and adhered them with adhesive foam.


The title meant a lot to me. While acronyms are part of our lives, my father is trying to decipher the acronyms that commonly arise during our Whatsapp conversations. While the official meaning of LOL is "laugh out loud", my father really thinks otherwise. On one occasion, he asked what is the meaning of LOL, and he thought it was "lots of love"! Creative for sure! That is how LOL got its new definition and definitely something special between my dad and I.

To create the alphabets, I turned to my WRMK Mini Alphabet Punch! It provides me with easy access to title making, and also covers a good area on my layout, making it prominent.


I must say, I am really a fan of fussy cutting. I added dimensions on the diamonds with smaller diamond/triangle pieces from the same pattern paper. As the word fussy suggests, cutting papers in rough fashion, so there is really no stress about it. Trust me, even if there was an over-cut in the paper, no one will notice! That is really the beauty of scrapbooking!

Another element I love to add are vellum. They are translucent, so they create a whole new detail without over emphasis. To adhere, simply use glossy accents where the glue dries clear so the glue stains will not be apparent.

Nowadays, we are also lucky to be able to use foil and glitter paper onto our layouts! That little bit goes a long way, and it helps to highlight the details on our layouts!

Finally to complete the layout, I added some clear and blue dew drops. They fill up the empty spaces without over cluttering - that's why they are my favorite! (And I really must add, MWL has just recently stocked many different colors of dew drops!)

Happy Father's Day to all the fathers out there! Hope you have enjoyed the walk through of this layout! You can learn more about stitching on layouts at Made With Love, we have a new workshop "Stitch and Sew" coming right up in July!

Materials used are available at Made With Love.
Made With Love
B2-08, 313 Somerset, Orchard Road
Tel : 67337630
Facebook |  Instagram

Supplies Used:
Pink Paislee - Paige Evans -
Pick Me Up Collection
WRMK Typecast
WRMK Mini Alphabet Punch
The Robin's Nest Dew Drops


Sizzix: Keychain | Owl

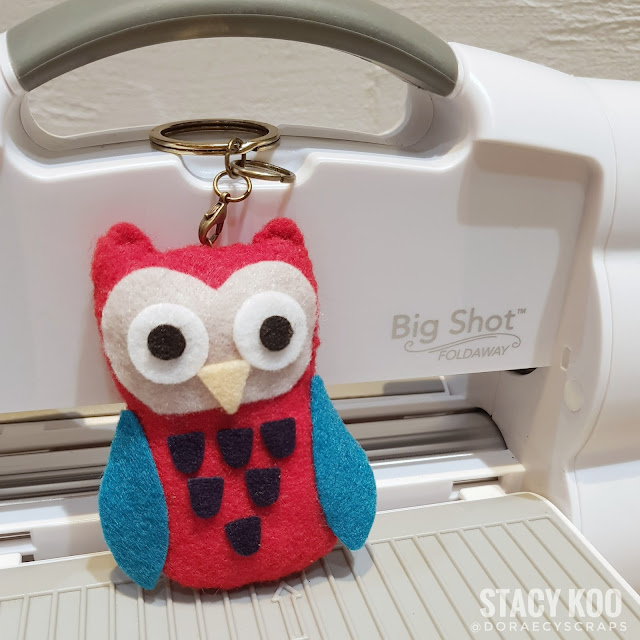
Hello everyone! I couldn't help but do another project with the Sizzix Owl Bigz die! This owl has me really hooked. This time, I used felt instead of paper and made myself a little owl keychain.


How cute is this! Just cut the pieces required to assemble the owl. For the body, I used blind stitching and inserted some foam for the body. For the rest of the elements, you can choose to stitch or simply add glue to assemble.

Viola! A quick project and now my clutch has a matching owl keychain to go along!


Hope this inspires you to use different materials for the bigz die and you can achieve different purposes!

Be sure to check out the Sizzix UK blog or Sizzix Lifestyle Instagram for more ideas!

For my local friends residing in Singapore, the dies are available at Made with Love  whilst stocks last!

Supplies Used:


MWL DT: LO | Joy

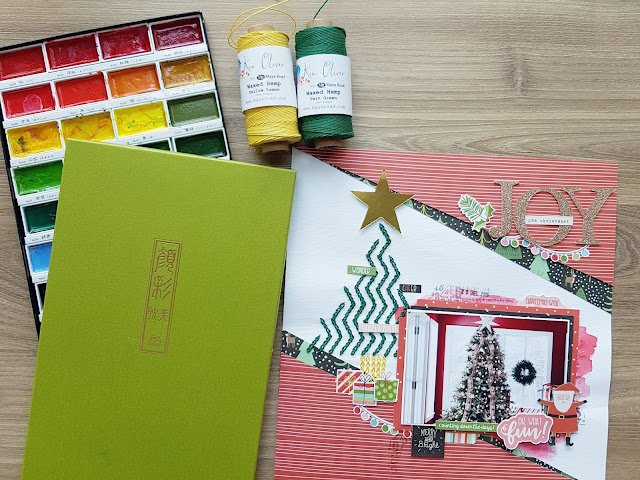
Hello fellow crafters! Today I am sharing a layout on Made With Love with some chain stitching!


Stitching on layouts are one of my favorite things to do. They always inspire the outcome of the entire layout.


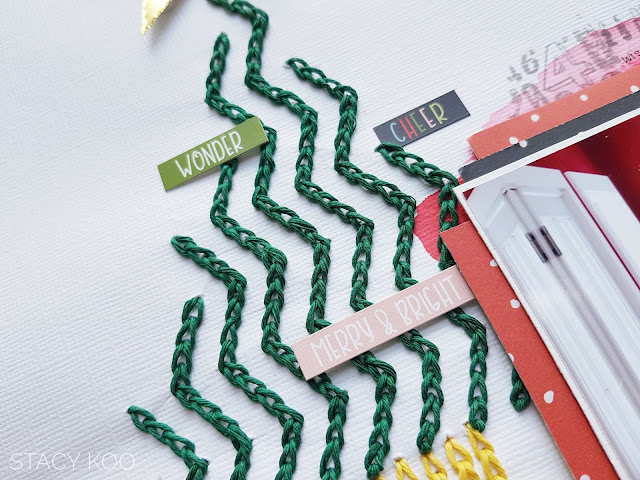
This time, I was inspired to stitch a Christmas tree geometric image with chain stitches. I have always wanted a Christmas tree for Christmas. Singapore homes are just too small to house a tree! But I always loved seeing the different decorated Christmas trees online or while visiting my friends' place.

Chain stitching are the basics of book binding. I like to use them on layouts! For this Christmas tree, I started with measuring the distances, and piercing the points for sewing purposes. The stitching was so therapeutic! This time, I am using the Mayaroad waxed hemp. I like that it gives a more solid feel, and the Christmas tree looks real!


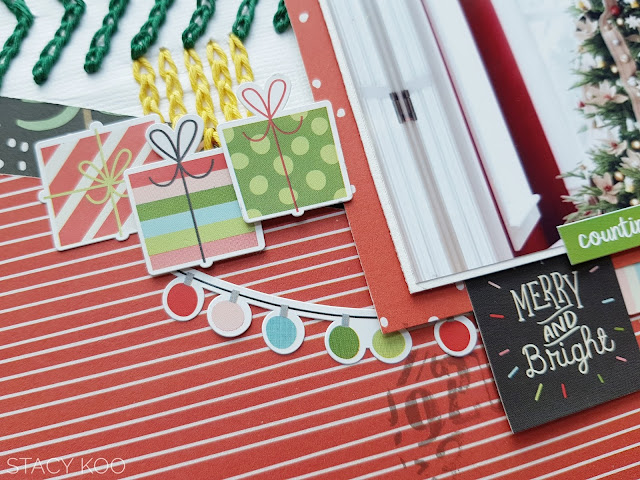
After the stitching was done, I started layering the photo and added sticker embellishments. Since I am layering these embellishments, I used the powder tool so that the sticker elements won't stick to the wrong places.


Behind the photo, I decided to use some water color to spice up the layout. Using the Gamsai Tambi is a breeze. Just spritz some water to the color palette you intend to use and brush it onto the cardstock. Then, I added some light number stamping in Versafine Grey. Let it dry or use a heat gun to speed up the drying process. Afterwards, decorating is like the sentiment "oh, what fun!"


To finish up the layout, I used the Sizzix die and cut out the letters J, O and Y. Large alphabet diecuts are my favorite! They are prominent on a layout! Add some embellishments and sentiments around the title to create interest.


I had fun with this layout, and hope you enjoyed the walk through! All products used are from Made With Love, thanks for dropping by my blog today! 

Supplies Used:

  • Gamsai Tambi Water Color
  • Mayaroad Waxed Hemp - Yellow and Green
  • Simple Stories | Oh What Fun! Collection - Combo Cardstock Stickers
  • My Mind's Eye | Oh What Fun! Collection - Wreaths
  • My Mind's Eye | Oh What Fun! Collection - Santa
  • My Mind's Eye | Oh What Fun! Collection - Wonderland
  • My Mind's Eye | Oh What Fun! Collection - Minty
  • Sizzix Bigz Alphabet Set 7 Dies - Serif Essentials
  • Sizzix Bigz Die - Stars


MWL DT: Mini Album | Scrappy Friends (Long Stitch + Twist)

It is my turn up as Made With Love DT sharing a mini album I've hand stitched recently! I am super excited to share this album which features a twisted long stitch binding!


I was inspired by the Kaisercraft 6.5" paper pad #Me collection sitting on my desk, and I love the colors. There were some interesting quotes in the paper pad as well. It is really easy to get started on making a 6" album with a paper pad collection. There is enough pattern papers for the inserts, and some embellishments which are perforated and you could just pop it out from the pack. 


On the front cover, I decided to add the Maya Road wooden mason jar and transparency clock. It is simple to come up with the album cover once you have the main elements decided. Another trick is adding strands of MR jute craft strings behind embellishments or flowers. They act as fillers in this case, fills up some empty spaces and create layers without being overwhelming. Sequins are also simple elements that really cook a storm. Add one or two randomly across the cover, and you get a subtle shine to the page.


There are many ways to construct the album. Each of the methods has its uniqueness, and in this case, I used some fabric to help construct this album spine. The contrast of fabric (on the spine) and patterned paper (on the covers) creates a unique look.


What is an album without stitching? For me, albums with hand stitching complete the look, and add a classy definition. Book binding makes a handmade album extra special! This time, I am adding some die-cut alphabets to my album spine. Like what you see? Want to learn how I did the stitching? Stay tuned to MWL's facebook page for the upcoming workshop in October! *Wink*


Here are some closeups of the album. Add some stickers or die-cuts in the pages - decorating the pages are super fun!

Supplies Used:

  • Kaisercraft 6.5" Paper Pad - #Me
  • Kaisercraft Sticker Sheet - Close Up!
  • Kaisercraft Sticker Sheet - Ooh La La!
  • WRMK Sequin Stickers, black
  • Maya Road jute craft string
  • Maya Road wooden mason jar
  • Maya Road transparency clock, white 

All supplies used are available at Made With Love. Hope you find inspiration from the post today and thank you for dropping by my blog today! 


MWL DT: Mini Album | 12 Days of Christmas

Try not to be alarmed by the title, yes it is only August, and 4 months away from my favorite season! I always like to make my minis a little earlier for the season, so when time comes, I just have to stick the photos and do my journalling. 

Today I am on the Made With Love design team, sharing a Christmas album I have prepared for this year. Christmas is always my favorite festive season, because it is filled with lots of love and joyous cheers!

12 Days Of Christmas

12 Days Of Christmas - Front Cover closeups

I couldn't help but to do some fussy cutting for the front cover. The little figures in the pattern paper (supplies below) are just too adorable! Decorations on this album are inspired by the pattern papers. These beautiful papers are by Pebbles - Merry Merry Collection. 

12 Days of Christmas - Sunburst

There are a total of 12 tags in this sunburst album. I made it 12, so it can house 1 picture each on my 12 days of Christmas. I wanted to document my 12 days with a photo of the day. Well 12 tags also corresponds to a sheet of 3x4 grid pattern paper! Since I love them so much, might as well use them all right?

Sunburst, tags close up

Here is the tag close up. I left some white matting on the tag, so I can just paste my photos in afterwards. The white mat also helps to highlight the photos! Then I did some more snipping. Randomly cutting out the florals in one of the pattern paper and used them as tag headers! Not only are they asthetically pretty, they function as a holder so I can pick out my tags easily from the pockets. 

Now don't forget to add some fillers! I used the Tim Holtz punch to punch out some leaves so I can stuff them in between the flowers or behind them. You will be surprised at how these little things add dimensions and layers to your project!

Piano Hinge Binding

How could I not have any binding for my albums? You can say that is almost impossible for me. So yes, I am making use of the piano hinge binding this time. The red and green combination has me wishing for Christmas to come soon! Top it up with weaving to complete the entire look. 

Oh yes, straws are used here. Don't worry, these are absolutely clean ones, used for scrapbooking purposes! I like these straws because they are sturdier than the usual ones, and they come in multiple colors! These straws are by Doodlebug Pixies - ladybug. 

All materials used for this project are available at Made With Love. 
Supplies:
• Pebbles - Merry Merry Collection
• Doodlebug Pixies - Ladybug (straws)
• Tim Holtz Punch - Pine
• Kaisercraft Decorative Block Words Dies
• Sizzix Thinlits - Gatefold Card, Birthday (bracket die for covers)
• AC white cardstock
• Red Twine
• Green Dotted Cardstock (fillers)

Want to learn how to do this? This month, I am conducting a similar workshop teaching how to construct a sunburst album with piano hinge binding. Don't forget to look out for more book binding projects / classes available only with Made With Love

Thank you for dropping by my blog today! 

MWL DT: Shine Mini Album with Hungarian Stitch

Hi everyone! It's my turn as Made With Love DT to share a little hand stitched mini album today~ I am so excited with this one, I did spend some time on the stitching and it was therapeutic!


I intend to use this for my baby niece, and she is a star. Therefore, I named this album "Shine". To construct this album, I have used 2 collections from Simple Stories - Faith Collection & Domestic Bliss Collection. These colors are my current fav to work with!


Making albums are a wheeze with the correct tools. For this album, I have used the Xyron (both the 1.5" and 5" unit) for the background pages, covers and tiny details like the title.


Yes, these are my current must have for album making! This saves around half the time taken to adhere the pages, and makes life easier for the tiny elements like the title. 


The inside pages are constructed using the We R Memory Keepers Tab Punch board! Details like these help to enhance the album! Just 2 punch action and 1 cut - yes it is that simple! 


Another great use of the tab punch! I like to slot some tabbed pages into pockets, so I can remove them easily to add journaling to the back of the tabbed pages.


I love the hungarian stitch, it is one stitch with volume and details; and it is perfect for albums! This time round, I am using the hungarian stitch again, but with variation. The signatures in this album are sewn on with the hungarian stitch. 

All materials used for this project are available at Made With Love. 

Don't forget to also look out for more book binding projects / classes available only with Made With Love. Want to learn how the hungarian stitch is done? I will be running the workshop "You are awesome" in June which features the same hungarian stitch done in the vertical fashion. Do check out the dates in June!

Thanks for dropping by my blog today! 

[Feb 2017] Upcoming MWL Workshops / Kits

Busy busy busy! This month is coming waay too fast especially after my recent trip to US! This month also marks the Chinese New Year , which meant I had to spend time visiting my relatives. Time is really short! It had been project after project and I barely had the time to breathe this month. Thankful for the understanding husband who gave me a whole load of support and help!

Still, the creative juice is flowing and I am so thankful for that! 2 kits up and the 3rd kit is on its way - how awesome is that!

Made With Love Kits


First up is the explosion box kit. This is the 13th edition since its debut! I am always enjoying new ways of making an explosion box, together with markings of my signature. Don't miss this! It is filled with loads of goodies and prepared with a lot of love!


Next up, accordion flip album. How sweet is this album for your loved one? It is also the best gift to document memories of friendship and love. Not only is this an album but it is also fully functional as a photo display. You can choose to obmit the embellishments and just add photos! I love how this kit came along!

For the 3rd kit, it is in its process. I am always in love with versatile albums, so look out for this pocket album coming up real soon!


Made With Love Workshops
I had to run this for another time in Feb due to popular requests! Not much kits left, this was a super popular class. A 10.5" album is a very versatile and useful one! Make yours today from scratch and get to learn how to construct an album from scratch!


Don't forget to check out this workshop 'Chic Love' and many other workshops available at Made With Love here. Do take note that these are limited classes and kits available. Don't miss out!