Showing posts with label madewithlovesg. Show all posts

MWL DT: LO | Singapore

Hello! I am back, posting as Made With Love DT today!

This time, I am sharing a layout done with Singapore as the theme. Afterall, National Day is coming right up, and amidst the celebrations, I wanted to do something for this special day!

I am proud to be a fellow Singaporean. No, it is not perfect, but Singapore has provided me and my family a safe place to live in. It has given me stability which I yearn for and a place I can call home. Being a regional engineer for most years of my working life, I have experienced many outstation visits, where life was hard and many systems not in place. It always made me appreciate home very much and never take anything for granted.

These 2 very beautiful drone photos (amongst the many beautiful shots) were taken by a very good and talented friend of mine. Eugene has taken so many nice shots of Singapore, inspiring me to get this layout done! Thank you Eugene for lending me these photos!


I started doing up this layout with 3 important parts - a flag, Vanda Miss Joaquim and of course the crescent and stars. These signifies our country very much, and I wanted to have these signatures in my layout.

For the flag, I die cut the Sizzix Bigz Die- Mosaic #661194 multiple times (4x4 format). Then I grabbed some white cardstock and embossed them with the Sizzix 3D Embossing Folder - Botanical #662716. If you have not tried the 3D embossing folders yet, you should! They give such delicate and pop up details! Our flag comprises of the red and white elements, so for the top half, I used a red pattern paper as the backdrop.


Vanda Miss Joaquim was all fun to play with! I must say that I felt really "allergic" to the color purple ha! However our Vanda Miss Joaquim does really deserve to be colored in the correct tone. I used Distress Makers and a thin paint brush for this. Check out this helpful Sizzix video on how you can make your own orchids for your layouts or craft projects! Instead of using the same dies as mentioned in the video, I chose to use the Sizzix Bigz w/ textured impressions Butterfly Embellishments #662442. They work the same wonders, have fun experimenting!


The crescent was cut using 2 circle dies of different size. The framelits are my most used dies. Basics are so important to any die-cutters - got to have some in your collection! To further enhance the white foil crescent, I ran it through with a swirl embossing folder. Textures are important for me on my layouts. One way to add texture is having embossed images. For the stars, I used the Sizzix Bigz Die - Stars #656339.

I have a few of the Alphabet XL dies in my collection, and I truely appreciate the ease of use for them. Today I am using the Sizzix Bigz XL Alphabet die - Typo in Upper Case #661198.

For the subtitle, I decided on a smaller font. I love this set - Sizzix Thinlits Holiday Block Words #660057 - the alphabets cut out individually, so you can always mix and match whatever titles you want! I use my xyron sticker machine to add adhesives to these small letters, and then adhere it onto a strip of cardstock. This helps me plan where I want to place the subtitles easily, instead of moving the small little pieces!

Have a great week ahead leading up to National Day! (P/S: We all look forward to that public holiday don't we? *wink*)

Materials used are available at Made With Love.
Made With Love
B2-08, 313 Somerset, Orchard Road
Tel : 67337630
Facebook |  Instagram

Supplies Used:
• Sizzix Bigz Die- Mosaic #661194
• Sizzix 3D Embossing Folder - Botanical #662716
• Sizzix Bigz w/ textured impressions Butterfly Embellishments #662442
• Sizzix Bigz Die - Stars #656339
• Sizzix Bigz XL Alphabet die - Typo in Upper Case #661198
• Sizzix Thinlits Holiday Block Words #660057
• Xyron 1.5" Sticker Maker

MWL DT: LO | LOL

Hello hello! I am posting as Made With Love DT today, sharing a stitched layout this time. It was Father's day yesterday, so today's post is really dedicated to my hero. Happy Father's Day, daddy! You are always my hero and first love *kisses*


When I started out this layout, I knew I wanted it to be in a geometrics theme. My dad is an engineer, he is also the one who had inspired me to be one. So when I laid eyes on Paige Evans' Pink Paislee Pick Me Up collection, I immediately got inspired by one of the papers.
Pink Paislee - Paige Evans - Pick Me Up Collection

What do you see from this paper? I literally saw diamonds jumping at me! So I took out my trusty scissors and immediately cut those shapes up, knowing they would well fit onto my layout. In addition, I did have them matted onto another pattern paper in the same collection just to give it a boost of contrast on the layout.


Oh, but I really had to add some more texture to the entire layout. Of course there had to be stitching! I decided to use another geometric design as the background, hence deciding to fill it up with a hexagonal/diamond pattern. Adding stitches adds a whole new dimension of texture and outlook to the entire layout, so I really love to add these stitches to my layouts.


Journal on your layouts! This is such an important part of layouts, but most commonly neglected. Most are afraid to write, but documenting memories really means recording the thoughts of the photo or layout. I use my trusted WRMK typecast for my journal purposes. It can take in 12" papers, and that is one big bonus for scrappers! In this case, I chose to cut them out in strips and adhered them with adhesive foam.


The title meant a lot to me. While acronyms are part of our lives, my father is trying to decipher the acronyms that commonly arise during our Whatsapp conversations. While the official meaning of LOL is "laugh out loud", my father really thinks otherwise. On one occasion, he asked what is the meaning of LOL, and he thought it was "lots of love"! Creative for sure! That is how LOL got its new definition and definitely something special between my dad and I.

To create the alphabets, I turned to my WRMK Mini Alphabet Punch! It provides me with easy access to title making, and also covers a good area on my layout, making it prominent.


I must say, I am really a fan of fussy cutting. I added dimensions on the diamonds with smaller diamond/triangle pieces from the same pattern paper. As the word fussy suggests, cutting papers in rough fashion, so there is really no stress about it. Trust me, even if there was an over-cut in the paper, no one will notice! That is really the beauty of scrapbooking!

Another element I love to add are vellum. They are translucent, so they create a whole new detail without over emphasis. To adhere, simply use glossy accents where the glue dries clear so the glue stains will not be apparent.

Nowadays, we are also lucky to be able to use foil and glitter paper onto our layouts! That little bit goes a long way, and it helps to highlight the details on our layouts!

Finally to complete the layout, I added some clear and blue dew drops. They fill up the empty spaces without over cluttering - that's why they are my favorite! (And I really must add, MWL has just recently stocked many different colors of dew drops!)

Happy Father's Day to all the fathers out there! Hope you have enjoyed the walk through of this layout! You can learn more about stitching on layouts at Made With Love, we have a new workshop "Stitch and Sew" coming right up in July!

Materials used are available at Made With Love.
Made With Love
B2-08, 313 Somerset, Orchard Road
Tel : 67337630
Facebook |  Instagram

Supplies Used:
Pink Paislee - Paige Evans -
Pick Me Up Collection
WRMK Typecast
WRMK Mini Alphabet Punch
The Robin's Nest Dew Drops


MWL DT: LO | Sew Cute

Hello crafty friends! I am back on the blog as Made With Love DT, with a layout using the lovely WRMK products today!

I must say, the WRMK products have made my life much easier as a crafter. In this layout, I made use of 4 punch boards, Typecast and Stitch Happy.


Isn't my niece cute! She is such a gem, and this is one of my favorite photo of her.


I started out with the WRMK tab punch board to create a tab. This tab piece helps to create an interesting matting to the photo. It also helps me create a link to add word sentiments! Here, I have used my (mint) typecast and typed out the word "precious".


Creating the title was easy with the WRMK mini alphabet punch board. All I had to do was to cut down pattern papers to size (1.5"x2.5") and then open up the Alphabet punch board app! 


This app made it very easy for me to get to the alphabets I needed to punch out!


Of course I had to use the sewing machine! Sewing is my favorite thing to do on a layout. It creates dimensions and a different texture on the layout. Mint is also my favorite color, I own both the typecast and sewing machine in mint. (Though I am also loving the sweet touch of pink!) For this layout, I did some straight stitches from the cloud to the tiles below, creating a visual of a baby's mobile on top of their cribs.


Here is the bottom of the "baby mobile". I cut 2 pieces of square pattern paper and slided them into the WRMK frame punch. I am using the 0.25" frame width on this layout. In one of the frames, I typed a little message to my niece using the WRMK typecast! Love to be able to customize a short message or journal on my layout!


Last but not least, my brand new toy! I recently got a new toy - WRMK happy jig! So many possibilities! I love that the happy jig is so easy to use! Included in the package is a booklet of ideas (and 3 colors of wires to get started with!) For additional inspirations, you can also look for @werhappyjig on instagram! 


For the word baby, I decided to give it a try to fix the pieces on my own. (The engineer in me just had to give it a try!) Viola! It was quite a smooth process! 

I found it easier to staple the wire words in place. Just 2 staples holding the start and end of the word, it works! 

Thank you for joining me today in my layout walk through. Hope you enjoyed it, and gotten insights of how you can make use of the WRMK tools. 

Materials used are available at Made With Love.
Made With Love
B2-08, 313 Somerset, Orchard Road
Tel : 67337630
Facebook |  Instagram

Supplies Used:
• WRMK Tab Punch Board
• WRMK Frame Punch Board
• WRMK Typecast
• WRMK Mini Alphbet Punch Board
• WRMK Stitch Happy
• Simple Stories "Oh, Baby" Collection


Sizzix: Keychain | Owl

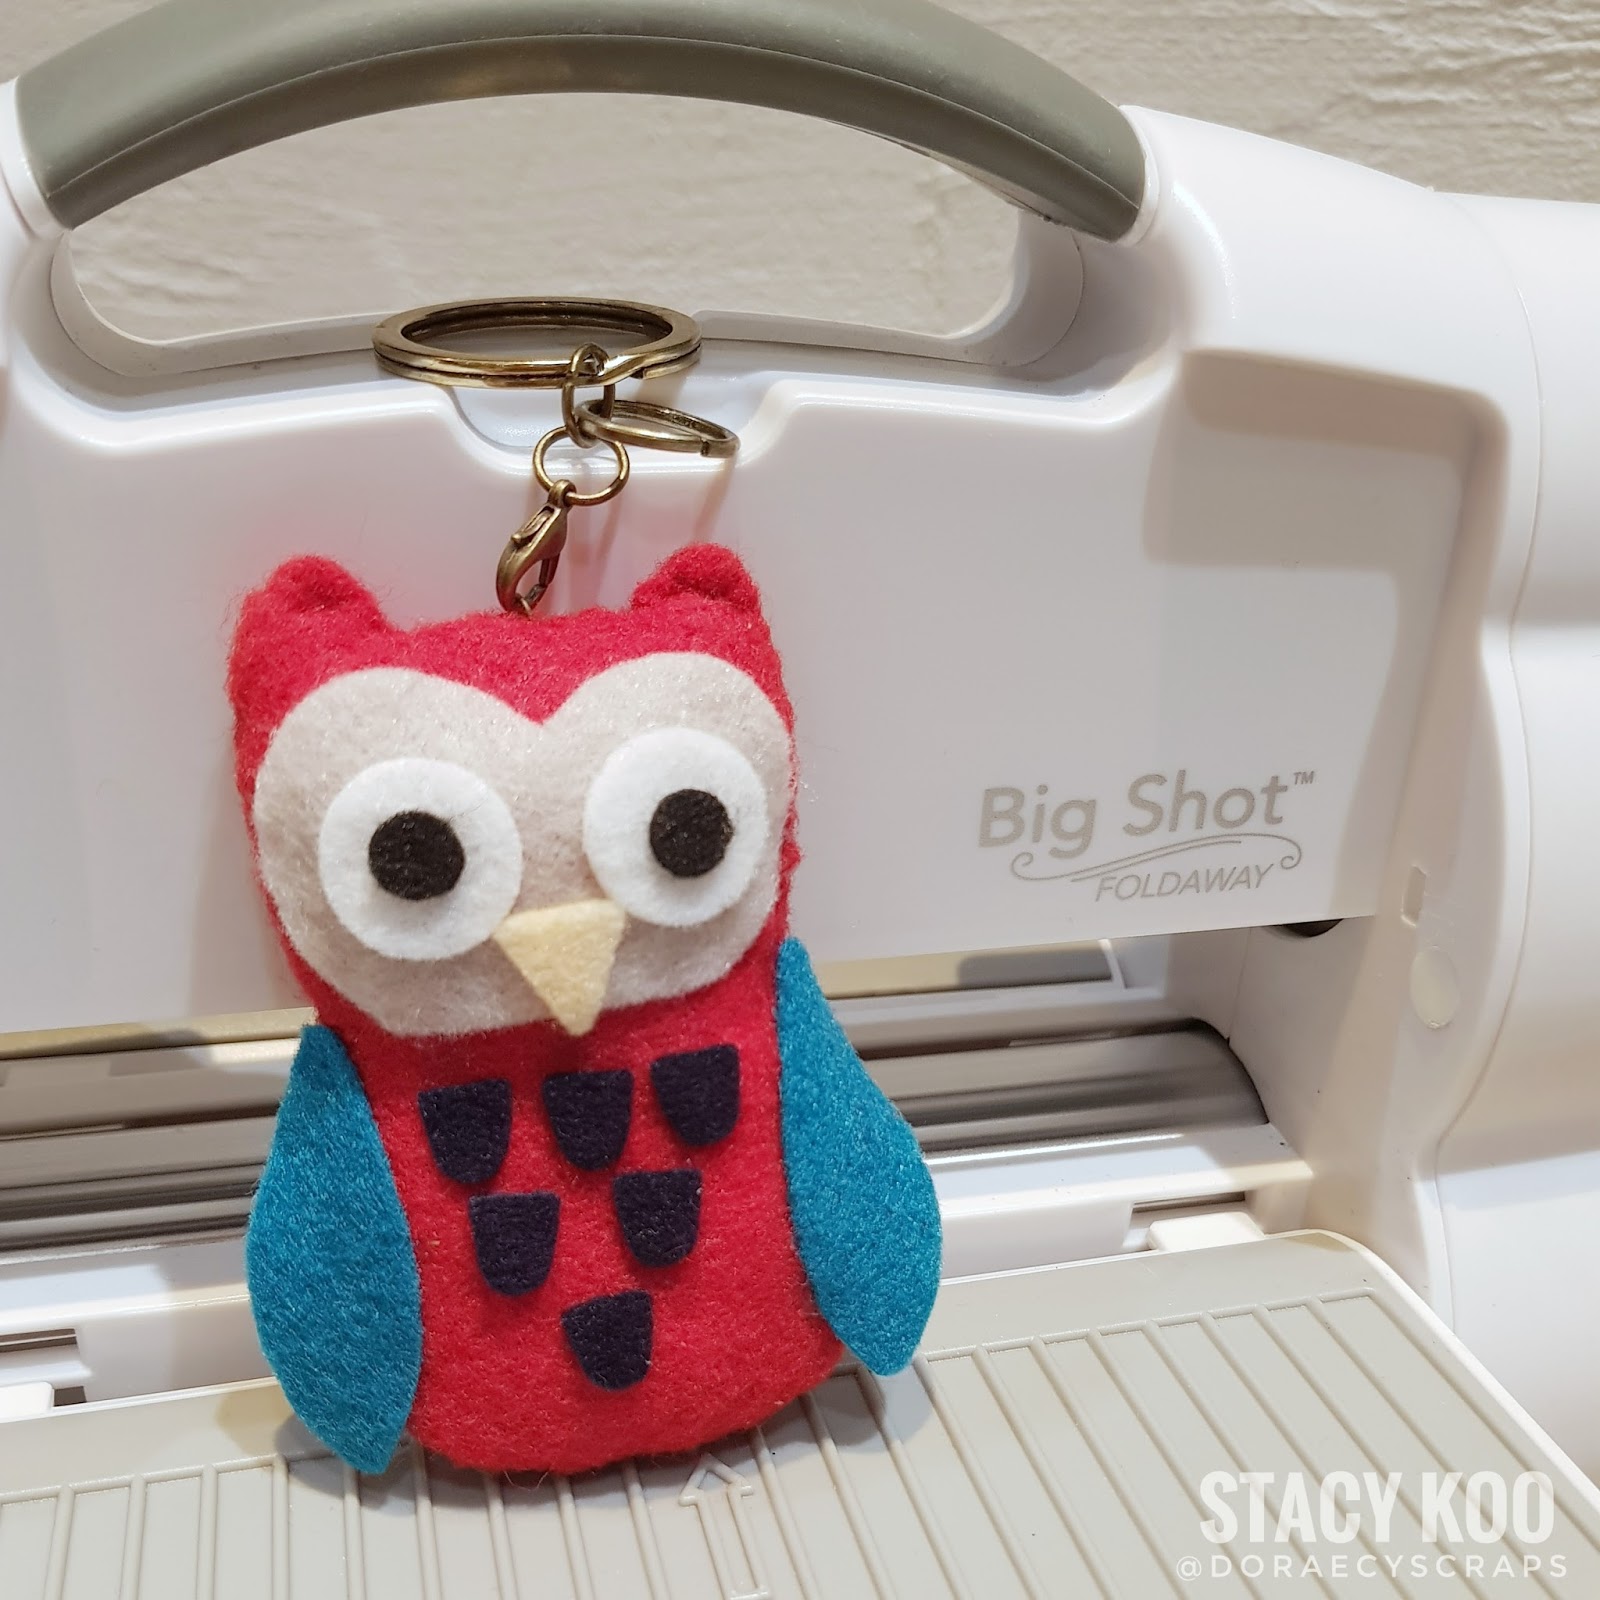
Hello everyone! I couldn't help but do another project with the Sizzix Owl Bigz die! This owl has me really hooked. This time, I used felt instead of paper and made myself a little owl keychain.


How cute is this! Just cut the pieces required to assemble the owl. For the body, I used blind stitching and inserted some foam for the body. For the rest of the elements, you can choose to stitch or simply add glue to assemble.

Viola! A quick project and now my clutch has a matching owl keychain to go along!


Hope this inspires you to use different materials for the bigz die and you can achieve different purposes!

Be sure to check out the Sizzix UK blog or Sizzix Lifestyle Instagram for more ideas!

For my local friends residing in Singapore, the dies are available at Made with Love  whilst stocks last!

Supplies Used:


MWL DT: LO | Love

Hello everyone! How has October been for everyone? October has proven to be challenging for me in terms of medical and on-going activities, but I am surely in the midst of the best company ever to get me through this month!

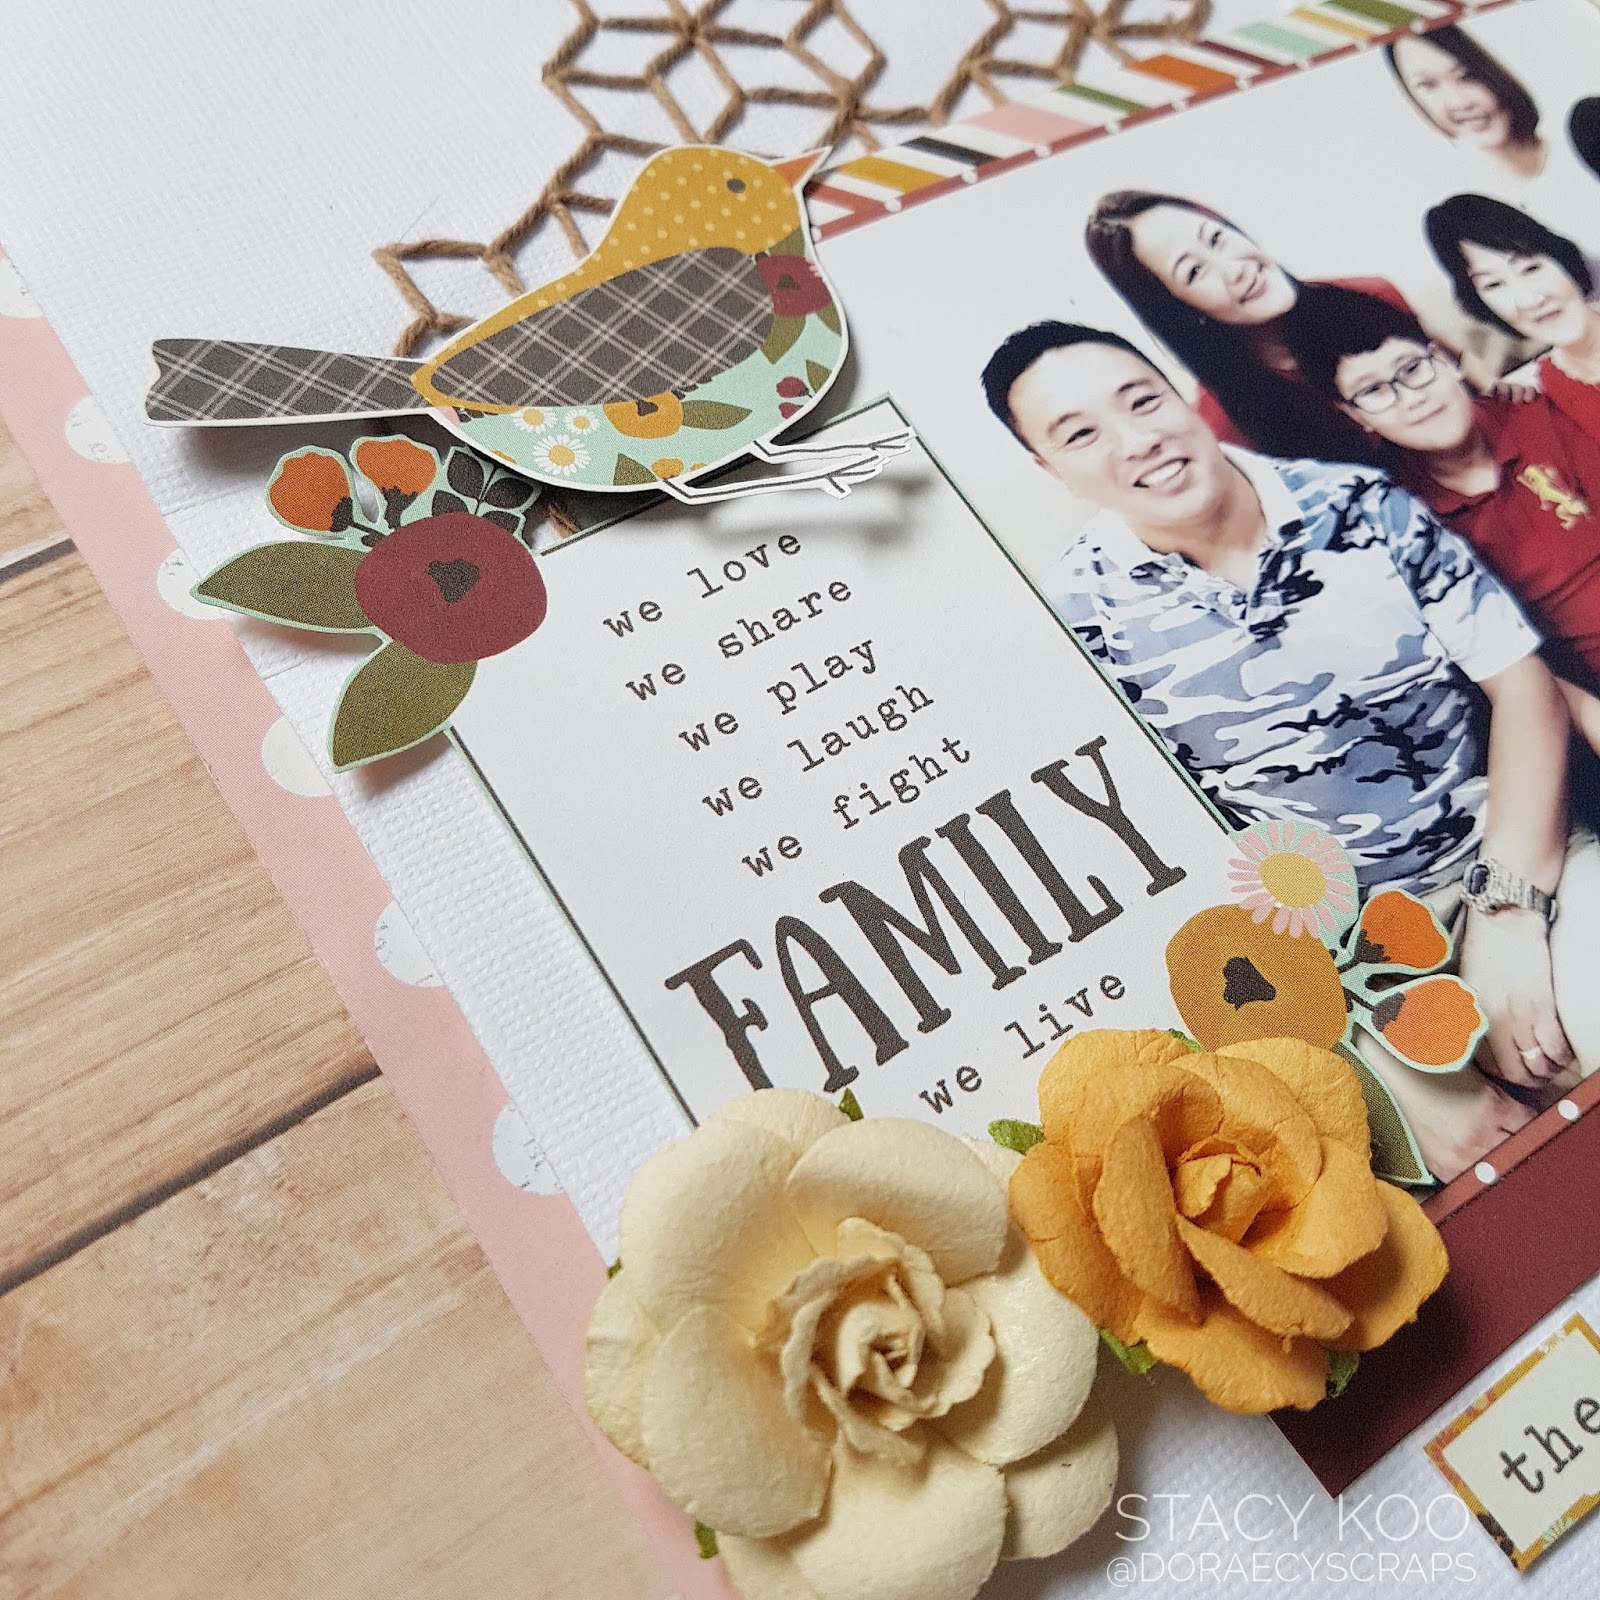
I am up as Made With Love DT today sharing a layout to thank my family. I am so blessed to have them by my side, no matter how challenging times were. It was inspired by 2 dies - Bundle of flowers (Sizzix Bigz L by Katelyn Lizardi) and Diamond Cluster (Sizzix Thinlits by Debi Patter).


I always love to add a stitch or two on my layouts. That is what completes a layout for me. It is also an interesting element to add dimensions on a layout.


The first thing I did was to lay the Diamond cluster diecut on the white cardstock. I know, it may seem like a completely different purpose of the die, but it does work as a stitching template for me too! Look out for other dies with the same capability, there are quite a number of dies which can do the same! Have a foam board or piercing mat below the white cardstock, and start with a few holes at the tips of the design. I secured the die in place with a couple of needles. Doesn't it look as though I am performing some sort of accupuncture on the cardstock? Ha!


After piercing the necessary holes, stitch away! I used regular long stitch method, weaving in and out of the holes. The end product is 2 sets of stitched damond clusters!


No, I do not really have a plan before I start stitching. I actually like to go wth the flow, and let the elements speak to me. This time, I have chosen Simple Stories - Vintage Blessings collection for my layout because of the beautiful and warm colors - perfect for family photos or any grateful themed layouts!


There are some family sentiments in the collection that really pops to me. I did some fussy cutting of the elements and added them to the layout.


Next, I really wanted to make us of the flowers die which I totally love! This is a must have - you can create 2 different kinds and I have chose one of the design this time. Another bonus, the construction of the flowers are easy! It is also easy to incorporate onto layouts as they are not very bulky.

Lastly, I added the title and some prima flowers to balance the entire layout. Who doesn't like a prima flower (or 2!)? That surely is a must have for layouts - instantly sweetens the entire deal!

Supplies Used:
  • Simple Stories - Vintage Blessings Collection
  • Sizzix - Bundle of flowers (Sizzix Bigz L by Katelyn Lizardi)
  • Sizzix - Diamond Cluster (Sizzix Thinlits by Debi Patter). 
  • Brown Twine
  • American Crafts Thickers - The Lucky Ones
  • Prima Flowers - Fleurs De Prima #597009

All suppliies used are available at Made With Love. Have a great week ahead filled with inspirations and thank you for dropping by my blog today!


MWL DT: Mini Album | Scrappy Friends (Long Stitch + Twist)

It is my turn up as Made With Love DT sharing a mini album I've hand stitched recently! I am super excited to share this album which features a twisted long stitch binding!


I was inspired by the Kaisercraft 6.5" paper pad #Me collection sitting on my desk, and I love the colors. There were some interesting quotes in the paper pad as well. It is really easy to get started on making a 6" album with a paper pad collection. There is enough pattern papers for the inserts, and some embellishments which are perforated and you could just pop it out from the pack. 


On the front cover, I decided to add the Maya Road wooden mason jar and transparency clock. It is simple to come up with the album cover once you have the main elements decided. Another trick is adding strands of MR jute craft strings behind embellishments or flowers. They act as fillers in this case, fills up some empty spaces and create layers without being overwhelming. Sequins are also simple elements that really cook a storm. Add one or two randomly across the cover, and you get a subtle shine to the page.


There are many ways to construct the album. Each of the methods has its uniqueness, and in this case, I used some fabric to help construct this album spine. The contrast of fabric (on the spine) and patterned paper (on the covers) creates a unique look.


What is an album without stitching? For me, albums with hand stitching complete the look, and add a classy definition. Book binding makes a handmade album extra special! This time, I am adding some die-cut alphabets to my album spine. Like what you see? Want to learn how I did the stitching? Stay tuned to MWL's facebook page for the upcoming workshop in October! *Wink*


Here are some closeups of the album. Add some stickers or die-cuts in the pages - decorating the pages are super fun!

Supplies Used:

  • Kaisercraft 6.5" Paper Pad - #Me
  • Kaisercraft Sticker Sheet - Close Up!
  • Kaisercraft Sticker Sheet - Ooh La La!
  • WRMK Sequin Stickers, black
  • Maya Road jute craft string
  • Maya Road wooden mason jar
  • Maya Road transparency clock, white 

All supplies used are available at Made With Love. Hope you find inspiration from the post today and thank you for dropping by my blog today!