Showing posts with label Sewing. Show all posts

MWL DT: 5 Questions (and a hand stitched wedding album!)

Hi everyone! I am joining alongside with the other Made with Love design team members who will be answering 5 questions for our DT posts. This marks a special edition and hope you get to know us better!

For first, I would like to share a recent project I have done. I believe in simplicity- so cardstocks, some simple/basic pattern paper and diecuts aid the creating process in most of my works. 

Here is my recent work:

In this 8.25" album, I used primarily cardstocks for the album cover and spine. The navy blue cardstock really helps to enhance the stitching. Here I used single coptic method to stitch the names. Since I was going to use the Sizzix Plus Ampersand die set on the front cover, I decided to use a smaller N in the stitching. The front and back covers were embossed by the Sizzix Plus Embossing Folders - Botanical Swirls. Embossing is a beautiful method. It gives texture and yet not too much detail. It is just enough for other decorations to take place above it! 

Here is a closer look at the front cover:

Using the Big Shot Plus machine really expands my possiblities of crafting and book binding! Want to know more about the Big Shot Plus? Be sure to make a trip down to Made with Love and the friendly staffs will be able to show you a demo.

All products used are available in Made With Love.

Ok, now its time for the 5 Questions (and 5 answers) :

1) Who am I ?
This year marks a new beginning to my life. I am a new wife to my dear husband, who is super supportive of my other love life - paper crafts and book binding. I began book binding as little as age of 5, but concentrated on it more during my teenage years (up till now and beyond!). It was by chance I got to pick up scrapbooking 10 years ago, and I never looked back since. It has been a wonderful journey merging 2 things I love in my projects. Currently, I am on a few design teams - Made With Love, Simple Stories and Maya Road. I am also an instructor at Made With Love alongside with the creative brains. 

2) What is my creative style ?
I was known to many for my browns and vintage style in the earlier days. Throughout the journey, my style has changed towards brighter tones. I really like the changes along this journey, it helps me explore more into the creative process and experience different moods. Embrace the changes! It is fun to look through the past works and see how different your style will change! Afterall the creative process is one filled with joy and experience!

3) What inspires me ?
Everything. I like to stare at building structures, artwork of posters or a stitching design on a sweater. They give me the inspiration I need. It can be in the form of structure on a layout or a stitching pattern I use on my books.

4 What I love about being Singaporean ?
The harmony of different races living in one country. This is especially special for me since I have travelled to countries. Because of the racial harmony, there is also a well balanced spread of food choices in the food courts! Oh well, where else can one find such a spread of food just in one place? I am super proud to be a Singaporean!

5) What do I wish for ?
Health. For my family and for my friends. There is nothing more important than health. With good health, everything else is possible.

There you go! Hope you got to know a bit more about me. Do stay tuned to the DTs who will be sharing their answers to the 5 questions too!


SS DT: 12x12 Layouts | New Hairstyle, New Look


Hi crafters! I'm on the Simple Stories blog today with 2 layouts using Posh collection. This collection simply took my breath away! The colors and theme rhymes with my new hairstyle!


I have had long hair for at least 10 years now. Through the years, I've changed some styles in between, but my hair was always below my shoulders. Before I made the dive to cut my hair really short, my hair length was at my waist.

Here's how much I really cut off. (possibly more since the hair stylist had to do some trimming). Yes. That is quite a move!


Therefore, I decided to document this journey with the Posh collection! It's the best collection to go with the new look!

For my first layout "Sparkle", I added some stitches to the background of this layout. I found that it added another layer to the entire layout, and helps to enhance the pattern papers on top of them.

I also like to use basic shapes on layouts to highlight the beautiful pattern papers in the collection! Basic shapes are ever lasting details which you can add to layouts but not overbearing them.


To add some fun details, I added some simple machine stitch on each triangle to outline it. Not only does it further define the triangle shape, it also helps to create focus for the embellishments on top of it! Here I have used elements from the bits and pieces pack. I must say, this pack packs a POW! Totally in love with every single piece!


Don't forget to add some journaling to your layout! I realised that I have already forgotten much details on earlier layouts which I had not done any journaling. It is always good to document and highlight it with pretty embellishments!


There are so many useful and pretty elements in this bits and pieces pack! It was a breeze working on this layout!


A little more detail on the stitching and my favorite element in this layout - the chipboard "sparkle". Well, as the word says so indeed! I love that shine of foil! It gives a subdued shine, good enough not to steal the limelight of my photo! It is the perfect piece!

For the next layout, I had to document the start of my new look and the support from my husband. While creating this layout, I started thinking about the support from my husband and the fact that he was my pillar in times of good or bad. Then I decided to create a vertical background where the vertical strip denotes pillar and timeline. It might sound wierd, but i get ideas like that to start my layout!


I had a lot of fun with the decorating, you can say I was spoilt for choices!

I did not have to look too hard to find the title, the 4x4 & 4x6 Vertical Journaling elements was sitting right in front of me with the exact title I needed! Some fussy cutting, and then sewing it onto the layout. Then, just because I am in love with the foiled elements, i decided to add another just below my title! The foil "today" is from the Posh - Bits & Pieces pack too!


Seriously, I am having too much fun with the foiled embellishments. Here are some more from the bits and pieces pack! The chipboard stickers have also foiled bits, like the heart I have used below.

Throughout the layout, I have also added some stitching to the "pillar" to create some added interest.


Using the chipboard frame from Life in Color collection for my main photo together with the pretty POSH elements!


This bird element is perfect! I wanted to give it a glow so I went ahead to do some fussy cutting on the 3x4 Journaling Card elements. It is the one with the word shine. I decided to save the word for future use, but just using the lines to create a glow for a beautiful element!


Similarly, i added the glow to Winston! Did you participate in the earlier naming contest in Simple Stories instagram? Winston is such an apt name for it, and I am so fond of it!

I have also layered another 3x4 Journaling Card element here. It is so simple to add layers with the journaling cards!


So there! I hope you have enjoyed the walk through of these 2 layouts and hope they inspire you to do something creative!

For those residing in Singapore, Simple Stories is available at Made With Love! :)


 Visit Simple Stories for more inspirations!


MWL Workshops: Documented Journey (Sept 2016 ~)

Hello! Time just wheezes past fast, isn't it? We are now in the month of September, and I am holding a new book binding workshop at Made With Love! Learn how to make full use of your tools and die cuts to bind!

Description: Long stitch binding has always been a pretty and well used stitch in book binding. This time, we will make use of templates to help construct this journal and sew! Work together with embossing techniques to showcase a faux metal look to complete the journal in style! Come join Stacy in a fun packed class to make this journal and document your most precious memories!

Techniques Learnt: Long Stitch Binding, Journal Construction, embossing


More details of the class time slots are below. Do take note that there are limited classes and kits available. Don't miss out! 


MWL DT: Single Coptic Stitch with name - Mini Album

Hi crafters! It's me today sharing my mini album as Made With Love DT and I had so much fun with stitching this time round!

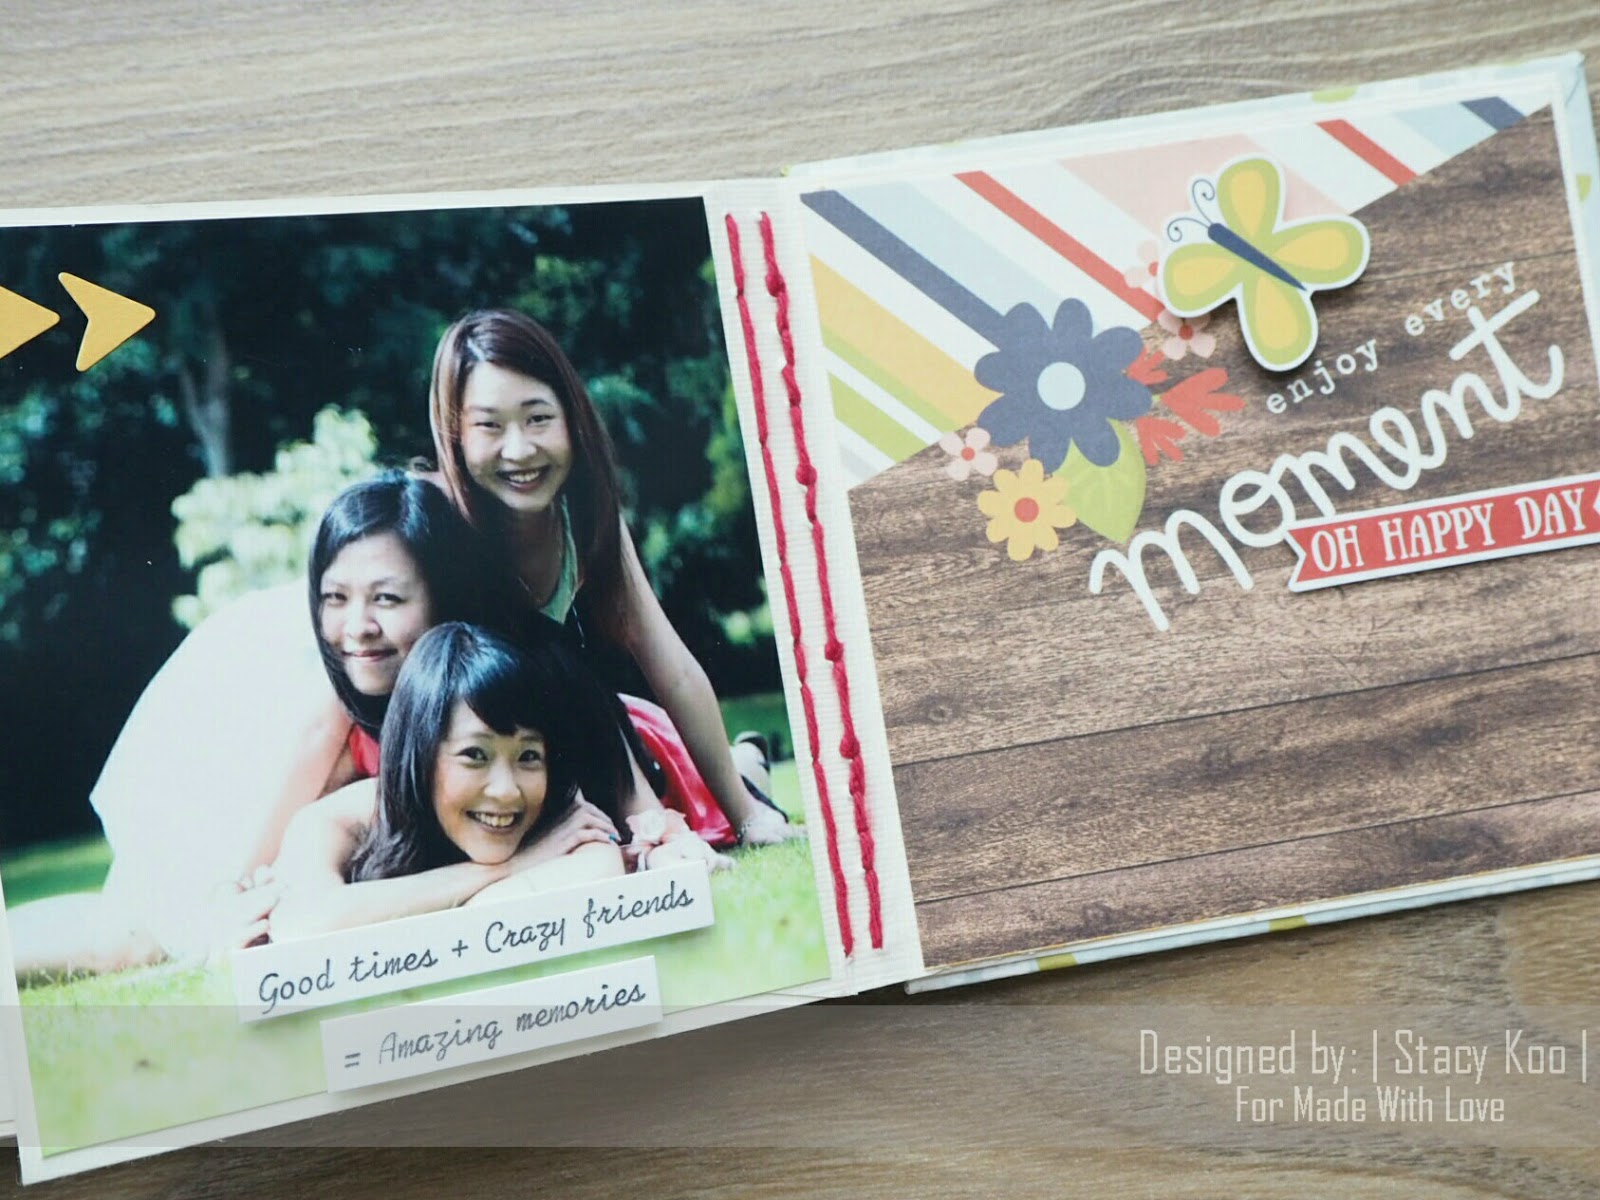
I wanted to personalize the album for my friends. My best friends. There are so many albums I want to document our friendship so I reckon that an album with a named spine might be useful. Think of how they look if you create a few albums and put them side by side on the book shelf?


This form of sewing uses the single coptic stitch. There is so many possibilities with one form of sewing, and I am happy to be expanding the stitches to create the spine I want.


This mini album took me 2 hours to sew and another half hour for decoration. I have to say that the sewing time was long, but definitely worth my efforts! Here's a look into the album.


Sewing cultivates my patience. Really it does. There are so many ways to make the sewing process a lot easier, but nothing can make the perfect sewing except if you are patient enough to go through each and every step with accuracy. One wrong step at the initial stage, and you could go hay wired in the next steps to come. With every practice, the stitching becomes easier, and there would be less room for errors. There is no short cut in sewing, and as the saying goes, practice makes perfect.

I can't say this enough. Each binding is unique to the receiver. I can create different types of binding to suit the occasion, and I can alter the stitches to make it work for me. That is why I keep binding. This is also why it intrigues me every time when I see a particular pattern I want to add to my album. Or maybe I see an apple on the table, and the next thing I know, I would pick up my pencil to draft the sewing pattern on my notebook. (okay, maybe not apple, but you get the point.) 

I like this kind of challenge. It spurs me to think of new ways to showcase my albums. It pushes me to be more patient with every mistake I make (yes, I tend to re-do the entire album until I get it right.) But that's how we learn right?

Look forward to my book binding classes! There is something new which you can pick up to customize your own album!

All materials used for this project are available at Made With Love. Don't forget to also look out for more book binding projects / classes available only with Made With Love

Thanks for dropping by my blog today! 


SS DT: 12x12 Layouts | Happiness & Joy

I'm on the Simple Stories blog today with 2 layouts. 

I have been inspired by stars recently, and I love how brightly they shine up above the skies. There is much hope and joy, so I would like to share that today.

In my first layout, i titled it Shine Like a Star, using Sunshine and Happiness collection. On the backdrop, i did some stitching of the Star of David and had them spread out randomly. Add some enamel dots at the corners of the stars, it helps to highlight the shape of the star!


Here is a closer look on the title. I like to stitch through my title and give it emphasis. Here you can also see how I varied the size enamel dots on the edge of the sewn stars.


Layering embellishments is always easier with Simple Stories. The collections can also be mixed to achieve what you desire. Here I used the chipboard frames, floral and memory stamp embellishments (bits and pieces) from Life in Color collection, wood veneers from You Are Here Collection and decorative Clips from Carpe Diem Collection. I think it is cool to mix and match the pieces required to complete the layout, and having significant embellishments to tell your story.


The other part of cluster which I adore! Here you can see the remains of the chipboard frame. I cut them up using a strong pair of scissors and layered it here. 


For the second layout, my influence came from some circular structures I have seen around the buildings recently. I tend to draft and doodle ideas on the go in my notebook and sometimes using them in the layouts I create. In between creating this layout, I decided to go ahead and add some string art! This was fun! 


To create a subtle focus to the circular elements, i added some arrows on the sides and machine stitched them. I chose a plain white cardstock so it does not overwhelm the entire layout and blend with the backdrop. Here I also added some embellishments to cover the area. Love this bird! Around the photo, you can see a scallop border and some string art added as a matting for the photo.


More string art here to the main cluster of embellishments.


Let's take a closer look at the circular elements in this layout. I like how simple it is to embellish using the pattern papers in the Sunshine and Happiness collection!


There has not been much sunshine in my area recently, most days are covered with clouds and the day seems less bright. Using this collection in the layouts have given me much shine and happiness, and I hope they brighten your days too!

For more details, check out Simple Stories blog! I had so much fun with these layouts and i hope you enjoyed them too! There are so much packed in the kits, there is always something in the Simple Stories collections that you will find apt for your crafting needs!

For those residing in Singapore, Simple Stories is available at Made With Love! :)

 Visit Simple Stories for more inspirations!


Simple Stories Supplies:

MWL DT: Binded Album | Grow

Hi crafters! It feels good to be back after a short break. Been missing some crafty time and today I am sharing a mini album which I had been working on. 

I had been on a short break due to my traditional wedding. During this time, loads of ideas popped into my mind and that's how this mini album came to place. While digging for childhood photos, I came across many photos which I have not even seen myself. Therefore, I wanted to document down the growing up process in the form of a mini album.


The paper collection I chose this time is from Simple Stories "Bloom & Grow" collection. The elements fit the theme of my mini, and I love the vibrant colors to tell the story I had in mind!

What is a mini without stitching? This time, I am inspired to do some cross stitch on the spine of the album. 


Now that is exactly what I do with my mini albums! I kept the soft spine this time, as this album houses 14 pages and I can keep many photos within this album! Here is a look at some of the pages:


I really looked like a boy when I was a baby! Even my parents had problems recognizing if it was my brother or me in the photo. I must tell you how much I loved the enamel dots! They helped to fill small areas and not over cluttering. A must have for all projects! Sometimes these small touch to the page can create a big impact! It always works!


I was very close to both my dad and my brother at young times. I guess that is why I have a boyish nature! 


Such a typical photo isn't this? Try searching for a childhood photo with you and the phone. It is such a common phenomenon with our parents last time! Funny! I added a sentiment "Gnome what I'm saying?" - totally apt!


There is no need to place photos in every page. I decided to let 1 photo be of special importance, so I let the other page contain a sub-title instead. I am going to add some personal journaling later on, and may want to use the space behind the subtitle to add a tag. The words in this collection are so cute! This one writes "I love you from head to-ma-toe" and I couldn't stop giggling about it!

Hope you liked what I shared with you today. There are many ocassions which you could do a mini album. It is special yet not time consuming, and receivers will be so happy with the photos and story!

All materials used for this project are available at Made With Love. Don't forget to also look out for more book binding projects / classes available only with Made With Love

Thanks for dropping by my blog today! 


MWL DT: Hungarian Braided Chain Stitch Album

Hi everyone! Time passes really fast and I am back with another book binding project inspired by a die-set! Yes, I am amazed at this journey, how we get inspired by different elements and dies etc. I have often found myself inspired by the dies I see on the racks on Made With Love! I put this project together in about 3 hours and I also found myself trying out a new stitch again!


Project planning helps to save some time for the entire process. Before I started on this project, I pulled out some dies which I am using. I really like the mini album die by Sizziz - Lori Whitlock. There are so many elements in this pack so it was really sufficient to make an album with this pack. In addition, I picked out the Maya Road rolled flower and geometric leaf die to complement.

After the necessary die-cutting, I assembled the album together. I didn't make use of the holes in the die-cut, but I decided to add a spine with the existing score line. Honestly, this idea came about only after the pieces were cut out and I decided to go with the flow!

Here's a look at the album:


This stitch is known as the Hungarian Braided Chain Stitch. I use it as a book binding stitch as it gives an embossed looped outlook, and it is very pretty when done with a thick spine. I find that this stitch gives a "full" look to the spine and creates a good amount of interest.


The rolled flowers and leaves are such a gorgeous pair! 
The die set also includes the insert page die. Here, I've used various Simple Stories "You are Here" collection pattern papers for the insert pages. There are also numerous dies from the pack which I used randomly in the pages of this album.


Supplies used are available at Made With Love.

Do also check out Made With Love FB page for more book binding class schedules! :) 

Hope you enjoyed this album and have a creative filled month of May!